Focus stacking with Fuji cameras
A concise overview of how to use Fujifilm's in-camera focus bracketing feature with example images. What do steps mean? And how many frames do you need?
Intro
Focus stacking with Fuji’s focus bracketing feature (TL;DR) #
There’s been a lot of discussion about this feature, provoked by a lack of official documentation. The key takeaways though are this:
- Frames can be set to more than you need. If the lens reaches infinity the bracketing process will automatically stop. Or, you can manually stop the function once you see the furthest part of your subject is in focus.
- Think of Steps as the amount the focus shifts between frames. The shallower your depth of field the more critical the focus overlap will be to create a convincing stack, so use a smaller step number when shooting macro than landscapes (Steps 1–5 is supposedly equivalent to 20–100% of the depth of field of a single frame).
- Interval: If you’re worried about camera shake or flash recycle times, or if you are tethering, increase the interval.
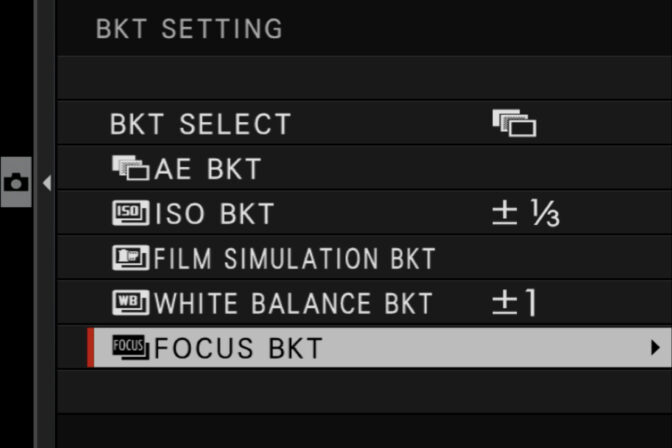
Focus stacking and focus bracketing #
The Fuji focus bracketing function automates the change of focus distance (at a predefined increment) across a preset number of frames. The resulting images can then be combined (focus stacked) into a single frame, creating a deeper depth-of-field than is achievable in a single image.
This is beneficial in situations where a large depth-of-field is difficult to achieve, such as landscapes, macro photography and low light situations.
Which Fujifilm cameras have focus bracketing? #
The following Fujifilm cameras (with latest firmware) have the capability to automate the capture of images for focus stacking:
- GFX 100
- GFX 50R
- GFX 50S
- X-H1
- X-Pro3
- X-T4
- X-T3
- X-T2
Focus bracketing frames #
The number of frames can be set between 1 and 999. The number of frames needed will vary depending on the following factors:
- Depth-of-field provided by the current aperture
- Distance to subject
- Size of the ‘Step’ set in the focus bracketing menu
When using the Focus Bracketing function, the camera will stop if the lens reaches infinity. This means that setting a higher frame number than necessary is not a problem.
What is a focus bracketing step? #
The short answer is the amount of focus shift between each frame. So for closer subjects or longer focal lengths a smaller step number is recommended to ensure enough overlap to create a seamless stack.
The step value from 1 to 10. The Step is calculated using the distance between the near and far limit of the depth-of-field on the first image captured. Setting the Step to 1 moves the focus by approximately 20% of that distance. A Step of 5 moves the focus by around 100% of that distance. As an example, if the difference between the near and far limit of depth-of-field is four feet, a Step of 5 would move the focus point four feet for each shot.
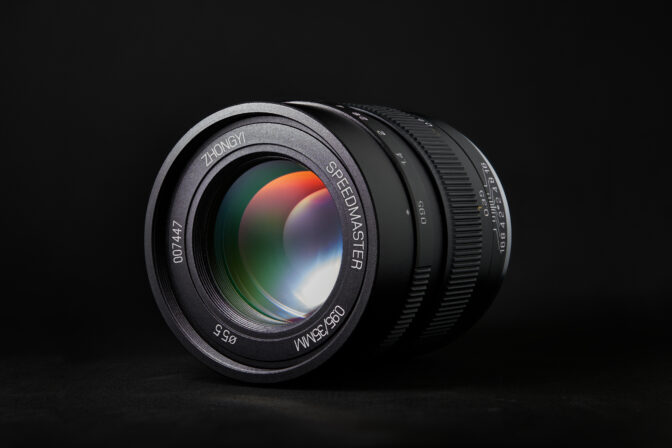
100 focus bracketed images combined in Affinity Photo. Shot with the XF 50mm f/2 at near minimum focus distance at f/4. Focus bracketing Step set to 3. Interval 1s. I set the number of frames to more than I needed (200) then stopped the process when the furthest part of the lens was in focus.
What is an interval? #
The focus bracketing interval is simply time taken between shots; this can be anything from 0 to 10 seconds. If you are worried about shutter shock or a wobbly tripod, setting a longer interval can be useful. If the light in the scene is changing quickly a shorter interval is advisable.
An interval of zero seconds is only available when using the electronic shutter. It’s also worth mentioning that if you’re shooting tethered, you’ll need to set the interval to 1s or above.
Quick start focus bracketing settings #
According to the aforementioned article, the following values can be used as a general guide for getting started:
Landscape photography
- Frames: 20
- Step: 10
- Interval: 0
Macro photography
- Frames: 100
- Step: 5
- Interval: 5
Low-light photography
- Frames: 20
- Step: 5
- Interval: 10
Combining or focus stacking images #
Watch the videos below to see how to combine your focus bracketed images in Affinity Photo or photoshop.
More Fujifilm articles
Fuji 27mm review
Over the past year, the Fuji 27mm has been attached to my X-T4 come rain or shine. Read the Fuji 27…
Fuji 50-140mm f2.8 review
The Fuji 50-140mm f/2.8 is a workhorse. It's a rugged and reliable lens that delivers consistent an…

Live View Highlight Alert and Exposing to the Right
Live View Highlight Alert shows when highlights are clipping by flashing the overexposed area black…

Fuji webcam software for mac and windows
Official Fuji webcam software has been released. See compatible cameras and operating systems, and …

X100V field test
I borrowed an X100V for the weekend to test the new lens and to see how it compares to my everyday …

Architectural photography with the Fujifilm X-T20
We headed out for some architectural photography with the trusty Fujifilm X-T20; photographing the …